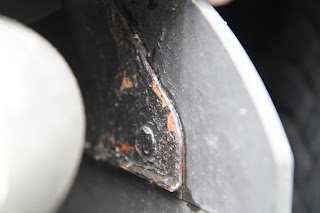
The pictures here show some of the visible rust:
Removing the mud flaps showed the rust was much more advanced on the other faces of the brackets:
To remove the mud flaps from the brackets, the rivets were simply drilled out:This showed that the brackets were also heavily rusted on the face covered by the mudflaps and the strengthening feature acts as a dirt trap:
Inspecting the mounting points on the outriggers and rear crossmember showed the rust had not caused any signigicant chassis damage:
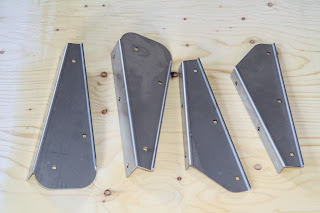
Before painting, the brackets were rubbed down with sand paper and cleaned to remove any surface contaminants.
A few coats of etching primer were applied to ensure a good key to the stainless steel.
The brackets were then sprayed with several coats of satin black paint.
Since the stainless steel is separated from the mild steel of the rear crossmember by paint and Waxoyl, there should be no problems with galvanic corrosion, however 2 different metals meet when the stainless steel bolts are fitted to the crosmember and outriggers.
YRM supply the stainless steel bolts as part of the kit, including nuts and washers for use if the captive nuts in the chassis are not useable. I have chosen to use the existing captive nuts and applied PTFE tape to all the stainless steel bolts before fitting.
After applying some Waxoyl to both the inner and outer faces of the crossmember and outriggers, the new brackets were attached with the original mudflaps.


No comments:
Post a Comment