Friday, 14 November 2014
4th Year MOT
Nothing much to report here. The Defender went for it's 4th year MOT today and passed without incident.
Sunday, 9 November 2014
Remote Central Locking Range Extension
Another common complaint on the Defender is that the range of the keyfob for the remote central locking is fairly poor.
My Defender does have less than ideal range and I often find myself stopping or walking back to lock the car after trying to lock it from a few strides away.
The aerial for the central locking is a normal copper wire routed to the top centre of the dashboard. A picture of the thick white wire can be seen here passing under the ducting for the heater.

The wire is fixed to the dash using a clip that slides on to an internal edge inside the dash. This took a bit of effort to remove, but it does come.

The wire is shown here after being removed, it's nothing more complicated than a piece of wire being used as a crude antenna.

The end of the wire had a bullet connector crimped to it to allow it to be extended.
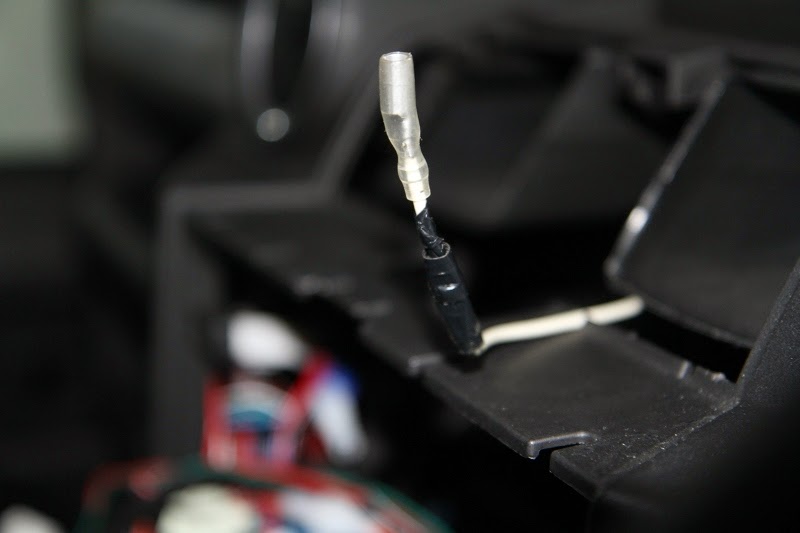
A matching bullet connector was crimped to the blue wire shown here. This was used to extend the cable.


After trying a couple of different locations for a time, I found the best location for the extended wire was the A-pillar. There is already a factory loom in this location, so the extension wire routed behind the instrument cluster and up along this loom.


Putting the plastic trim back in place leaves the modification completely invisible.

My Defender does have less than ideal range and I often find myself stopping or walking back to lock the car after trying to lock it from a few strides away.
The aerial for the central locking is a normal copper wire routed to the top centre of the dashboard. A picture of the thick white wire can be seen here passing under the ducting for the heater.
The wire is fixed to the dash using a clip that slides on to an internal edge inside the dash. This took a bit of effort to remove, but it does come.
The end of the wire had a bullet connector crimped to it to allow it to be extended.
A matching bullet connector was crimped to the blue wire shown here. This was used to extend the cable.
The clip was re-attached to the wire using a new cable tie and pushed back on to the original mounting location:
After trying a couple of different locations for a time, I found the best location for the extended wire was the A-pillar. There is already a factory loom in this location, so the extension wire routed behind the instrument cluster and up along this loom.
Putting the plastic trim back in place leaves the modification completely invisible.
Monday, 27 October 2014
Heated Mirrors Installation
Installing heated mirrors on a Defender is not an easy job. It seems like an attractive modification to do because the cost of the elements is quite low, however the task of installing them is very involved.
I purchased the Mudstuff heated mirror elements because the carbon glasscloth technology seems to be more robust than normal elements. (picture taken from the Mudstuff website)


To reassemble the hinge, I fabricated a new centre pin from 16mm aluminium rod with a 3mm wall thickness. A M16 fine pitch thread was cut into both ends of the rod and a 10mm long piece of 22.2mm solid aluminium rod was used to create a lock ring with the same pitch. The blank and threaded parts are shown here side by side.
 The hole in the top of the mirror arm was then drilled out further to 14.5mm to allow a matching M16 thread to be cut.


The parts are shown here ready for assembly:


To prevent the centre pins from working loose over time, high strength thread lock was applied

The assembled hinge ready for wiring and fitting:


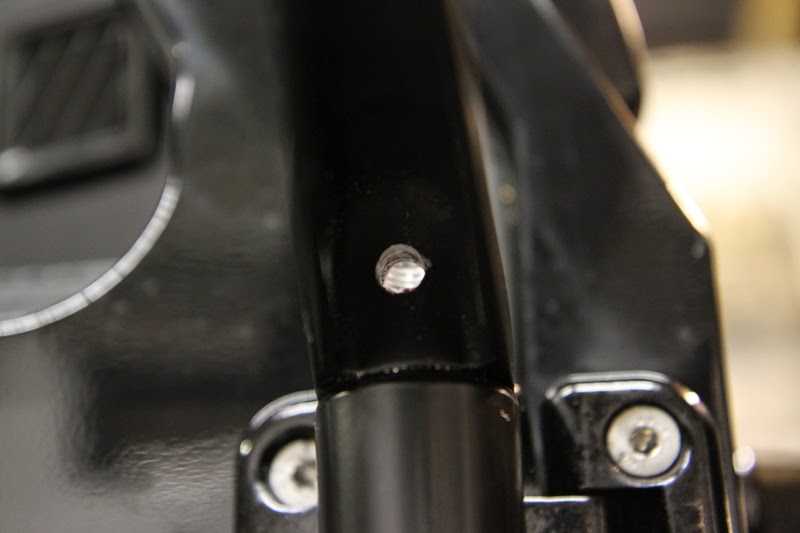
The hole in the door was drilled between the 2 door bolts, The grey stuff around the hole is a zinc primer to help prevent any corrosion.


The hole in the door hinge was again treated to zinc primer and paint to protect.


The cable and conduit were passed through the door, shim and door hinge:


And then trough the mirror hinge:

The cable was then routed up through the centre of the mirror hinge before it was attached to the door hinge:


A hole was drilled from the underside of the mirror arm into the mirror hinge.
And the cable was passed through.

Some Sikaflex adhesive was applied to the conduit:

A small G-clamp was used to hold it in position while the adhesive cured.

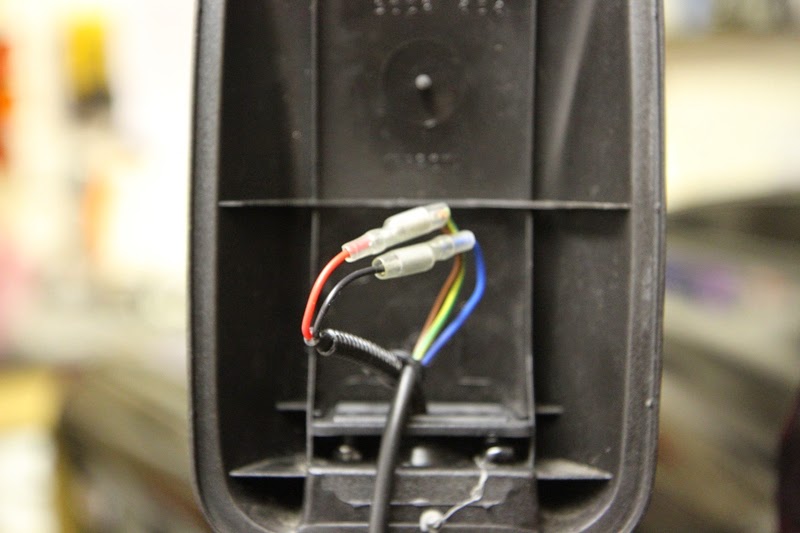
With the wiring passed into the mirror housing, the heating elements were connected with 4.7mm bullet connectors with insulating sleeves.


The wires were then routed through flexible conduit to a T-piece located in the engine bay above the pedal box.

Similarly, black and red wires were drawn from the door through the bulkhead to the engine bay.
 All 4 wires were fed into the T-piece
 And routed back through the bulkhead grommet to the area behind the dash. From here the cables are then routed through the existing conduit to the under cubby safe.


A small Y connector was made using an amp connector. These share the same crimp terminals as the Defender switches, so allow the loom to be modified with out creating any reversible damage.

In order to avoid complications if the doors ever need to be removed, the wires at the door pillars were terminated with 2 way Superseal connectors.

 These are sealed from moisture and are small enough to fit through the small aperture in the bulkhead


The last part of the wiring was to connect the wiring into the fuse and relay boxes


The fuse and relay boxes re-assembled:


I purchased the Mudstuff heated mirror elements because the carbon glasscloth technology seems to be more robust than normal elements. (picture taken from the Mudstuff website)
Having seen several other heated mirror installations on the web, I've never been happy with the execution. I did not want there to be any visible sign of the installation, so it ruled out the method shown on the Mudstuff website.
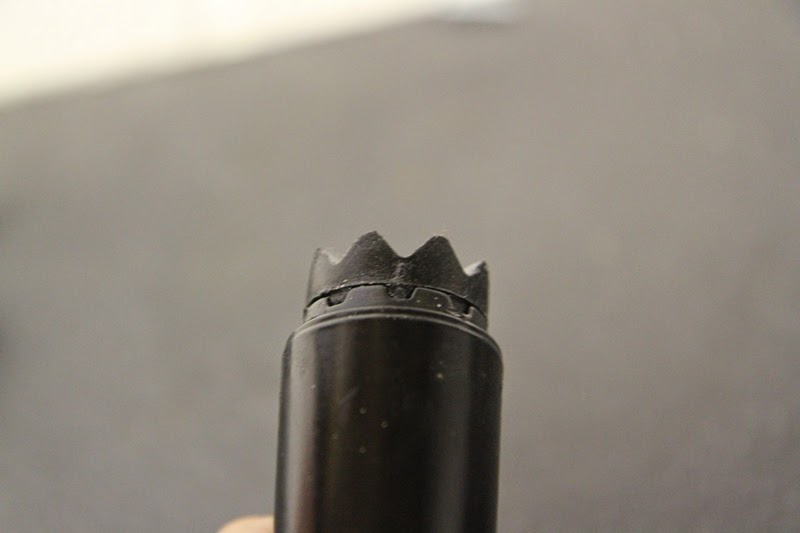
A better method for concealing wires involves drilling a hole in the steel tube of the hinge between the coils of the internal spring. There were 2 reasons that I couldn't do this:
- If the mirror arm is moved from the normal position, the steel tube would cut the wiring to the mirrors.
- The spring coils on my hinges were much more tightly packed (see picture below):
The door mirrors were removed from their housings by heating the rubber beading so that it became much softer.
The glass was then removed to allow the heating element to be attached:
The mirror enclosure required a couple of 8mm holes to be drilled through plastic to enable routing of the wiring. 8mm was used because the flexible conduit for protecting the wire has an outer diameter of 7mm.
The ball on the end of the mirror are was also drilled out to 8mm. A depression in the top of the ball makes it easy to start the hole centred:
The conduit and cable coming through the ball on the end of the mirror arm
The conduit is shown here entering the mirror housing after it has been reassembled on the mirror arm:
In order to install the wiring in a way that I was happy with, I devised a method of re-engineering the mirror arm hinges so the cable would remain invisible and avoid the risk of cutting.
The first part of the process involved drilling out the crimped steel tube that holds the hinge assembly together. Before drilling a 5mm parallel punch was used to knock the small black cap out of the top of the hinge:
The drilling was done with progressively larger drill bits and required a 13mm bit to finally release the assembly. It should be noted that the spring is under considerable tension and care should be taken to avoid injury.
The de-constructed assembly is shown below:
To reassemble the hinge, I fabricated a new centre pin from 16mm aluminium rod with a 3mm wall thickness. A M16 fine pitch thread was cut into both ends of the rod and a 10mm long piece of 22.2mm solid aluminium rod was used to create a lock ring with the same pitch. The blank and threaded parts are shown here side by side.
The parts are shown here ready for assembly:
When assembling the hinge, the crown piece that allows the mirror to lock into the different positions needs to be set in a particular way. The small mark on the plastic piece should be on the opposite crown position to the mounting holes of the mirror hinge.
The hinge was assembled using a Teng Tools gasket scraper which was a the exact size for the job. The lock ring had a 2mm wide slot cut in it for this purpose.
The lock ring was tightened to give enough tension for the mirror arm to operate as before.
The next part of the process was to start drilling holes in the hinge and door, this is the part I was least looking forward to. The hole in the hinge was kept low to match up with the low exit point from the mirror hinge
The hole in the door was drilled between the 2 door bolts, The grey stuff around the hole is a zinc primer to help prevent any corrosion.
The zinc primer was then covered in black touch up paint to give it further protection and strength.
The hole on the inside of the door was treated in the same way, making sure that the zinc and paint were well worked onto the inner faces of each hole.
The plastic shim for the door hinge was also drilled out to allow the conduit to pass through.
The cable was then routed up through the centre of the mirror hinge before it was attached to the door hinge:
And the cable was passed through.
A small G-clamp was used to hold it in position while the adhesive cured.
With the wiring passed into the mirror housing, the heating elements were connected with 4.7mm bullet connectors with insulating sleeves.
The wiring from the doors to the fuse box was first pulled through the bulkhead using a stiffer wire to draw the wiring through. The passenger side mirror is shown here using the black and purple wires
The wires were then routed through flexible conduit to a T-piece located in the engine bay above the pedal box.
Pin 4 (White/Black) was withdrawn from the heated rear screen switch connector. This is the signal that activates the heated rear screen relay when the switch is pressed
A small Y connector was made using an amp connector. These share the same crimp terminals as the Defender switches, so allow the loom to be modified with out creating any reversible damage.
In order to avoid complications if the doors ever need to be removed, the wires at the door pillars were terminated with 2 way Superseal connectors.
The last part of the wiring was to connect the wiring into the fuse and relay boxes
The main feed for the circuit was connected to the switched side of the fuse box. A 10 amp fuse was fitted to protect the wiring.
The fuse and relay boxes re-assembled:
To finish the job, the top and bottom plastic caps were refitted to the hinge. The top cap was modified to fit and fixed in place with Sikaflex adhesive
Pictures of the refitted door mirror, showing no trace of the installation (unless you are really short).
Subscribe to:
Posts (Atom)